
9th January 2026
Getting Started With LINICS – Part 1 – Installation
In this series of posts, we will be taking a tour through LINICS, from installation through to using some of the key tools.
In this first post, we will walk through the different ways of installing LINICS both natively on your machine, and as a virtual machine.
Virtual Machine Installation
The recommended approach is to install LINICS within a virtual machine (VM). LINICS has been tested in the major virtualisation platforms, including Virtualbox, VMWare Workstation and Fusion, and KVM. Any of these will work well to host LINICS, and all are now available free for non-commercial use. We would recommend avoiding lighter software such as VMWare Player, as this does not include the flexible network configuration of the other software.
The quickest way to get started with LINICS is with one of our pre-built virtual machine images available here. You can download the appropriate VM for your virtualisation platform, and boot straight into a fully setup LINICS install. If you are unsure which to download, then the OVF format is recommended as this can be imported into most desktop virtualisation platforms. For larger lab setups, KVM is recommended as this is supported by platforms such as Proxmox.
Recommended minimum system requirements are: 4 GB RAM, 50 GB Hard Disk and 2 Processor Cores.
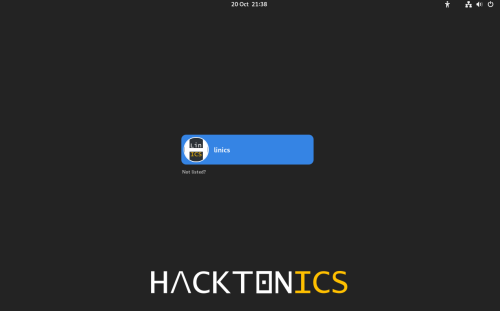
For pre built virtual machines, LINICS is configured with the username "linics" and password "linics".
You can also install LINICS inside a new VM by using the ISO download and following the "Installing from the ISO" directions below.
Baremetal Installation
LINICS can be installed outside of a VM directly onto a computer by using the provided ISO, and following the install directions below.
We do not recommend installing LINICS alongside other operating systems, in particular Windows with BitLocker enabled. We have experienced issues with installing alongside BitLocker, requiring recovery steps to be made in order to boot into Windows. If you still require Windows on your host, then we strongly recommend installing LINICS inside a VM, or using one of our pre-built VM images.
Installing from the ISO
We are going to install inside a Virtual Machine, but the same instructions apply for installing on baremetal.
Download and extract the LINICS iso. If installing onto a baremetal machine, you will need to make a live USB. Instructions for this can be found here.
First create an empty virtual machine in your virtualisation platform of choice. When requested to use an installer disk image (iso), select the extracted iso. An example from VMWare Workstation is below.
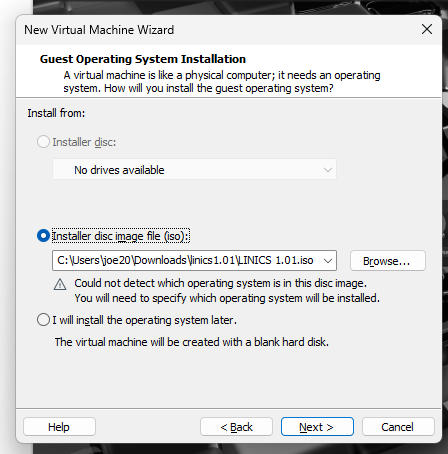
You will also need to select the OS type and version. Select "Linux" for the type, and either "Debian 12.x 64-bit" or "Debian 64 Bit" - the exact options may vary slightly based on your virtualisation platform but either will work.
Complete the rest of the VM settings, including the amount of storage, CPU cores and RAM. As a reminder, the recommended settings are 4 GB RAM, 50 GB Hard Disk and 2 Processor Cores. Once you have made the VM, boot it.
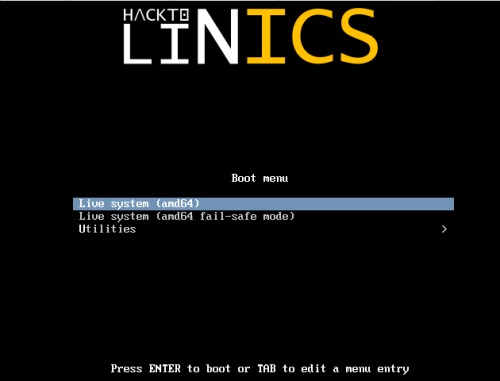
When prompted, press the enter/return key to boot into "Live System (AMD 64)
And then LINICS should boot into a live environment:
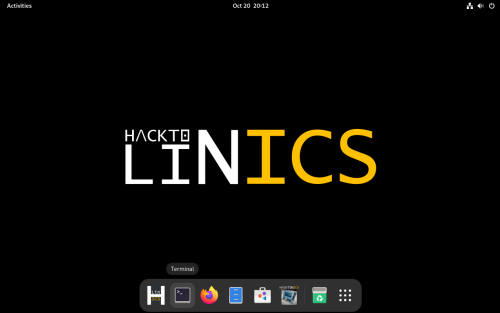
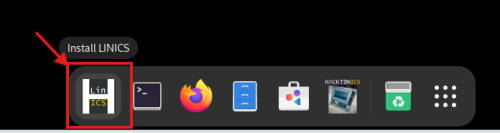
You can do some basic exploration of LINICS from here, however most of the tools will not work until you install the operating system. To do this, click the @Install LINICS" button on the taskbar:
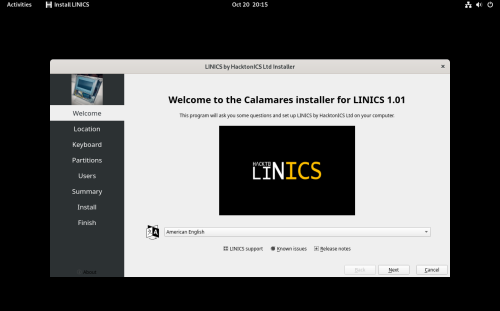
This will open the LINICS Calamares installer:
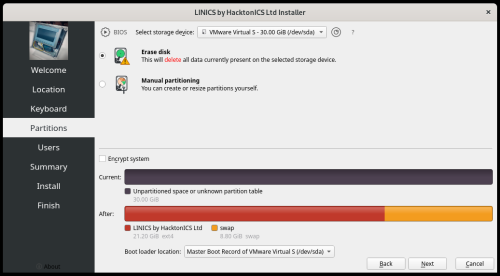
On the first few pages you will select your language, location and keyboard preferences. You will then be asked to partition the disk. If you are installing inside a VM, the simplest option is to select "Erase Disk". If you prefer, you can also perform manual partitioning. You should do manual partitioning if attempting to install alongside an existing operating system.
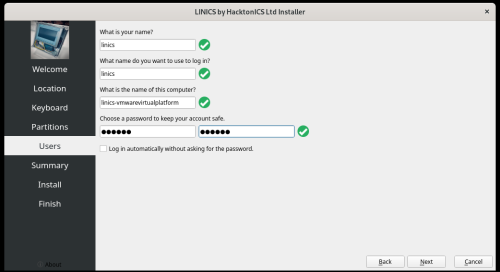
The final options screen is to configure a username, password and hostname. By default this user will have root access via sudo.
Once this is done, you will shown a summary of your chosen settings, and can then press "Install" to install LINICS. This should take a few minutes. If you get an error and you set your hard disk to less than 50gb, then try increasing the disk size of the VM and starting the installer again.
If all goes well, then you should see an "All done." screen. Congratulations! LINICS has been installed!
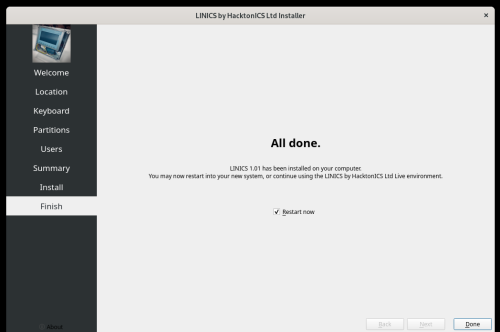
Click "Done" to restart the VM. You will be prompted to remove the live media and press enter - in most virtualisation software you can just press enter, but you may need to detach the iso file in the VM settings. Once you press enter, the VM will boot and you can log in with the credentials you set and start exploring LINICS!
Next Time
In the next edition of this series, we'll start exploring how to use LINICS once installed - how to locate tools, and how to use the LINICS launcher.